For the longest time now I’ve wanted to start working on something to do with just pure JavaScript. It’s one of my favourite languages and it’s always been the most fun for me to code in and do all bunch of crazy stuff, especially small games and animations.
This coincided with me starting to write on this blog again, so I thought of the perfect opportunity to combine those two things! Additionally to all of this I would like if possible to be able to tell some sort of a story, preferably through a game narrative.
So, let’s start by explore canvas! And let us do it with the help of our friend Jose, the Javascript Polygon. Now, if this sounds confusing let me just tell you that Jose is a polygon that lives in the Land of Chrome Metals, Foxes and mighty and not so mighty Explorers.
In an unstructured way we are going to learn how to create the world where our character will move around and explore and do a bunch of other stuff!
Preface
Before starting let’s just mention that basically we will not be trying to write perfect Javascript or use linting or care much about how the code is organized, but along the way we might try and use some libraries and introduce cool stuff, like physics to make the world come alive a bit more.
This initial first tutorial is going to be very basic and only introduce the basic concepts of the Canvas API
The World! The Canvas!
Let us start by looking at the world!
Our characters will live inside something called a Canvas, and this Canvas lives in a plain old HTML page:
<!DOCTYPE html>
<html>
	<head>
		<title>José's World</title>
		<link rel="stylesheet" href="world.css">
	</head>
	<body>
		<canvas width="800" height="600" id="world"></canvas>
	</body>
	<script type="text/javascript" src="world.js"></script>
</html>
We can see that in this simple HTML page we have defined several basic things. The main thing though is the canvas element, which is actually the world where our characters will do most of the adventuring.
The Canvas element and the Canvas API can be used to draw graphics and do all sorts of animations. It can do much more that just that and some things we might explore later on. But for now we will stick with the basic 2D Drawing.
We can also see that we have two additional resources loaded in the main html file The world.css stylesheet and the world.js script. We will look at those separately.
Ordering the Wrorld (world.css)
#world {
	position: absolute;
	top: 50%;
	left: 50%;

	width: 800;
	height: 600px;

	margin-left: -400px;
	margin-top: -300px;

	border: 2px solid #333;
	border-radius: 5px;
}
The world.css file initially will just center the 800x600 Canvas on the HTML page giving it a very basic border.
Creating the World (world.js)
The main part of this story is the world.js file. It is where the world and our character are first created:
(function(){
	var jose = {
		x: 350,
		y: 250,
		width: 100,
		height: 100,
		color: "#F38F1D"
	};

	var world = {
		color:"#F4F4F4"
	};

	var canvas = document.getElementById('world');
	var ctx =  canvas.getContext('2d');

	startStory();

	function startStory(){
		drawWorld();
		drawJose();
	}

	function drawWorld(){
		ctx.fillStyle = world.color;
		ctx.fillRect(0, 0, ctx.canvas.width, ctx.canvas.height);
	}

	function drawJose(){
		ctx.fillStyle = jose.color;
		ctx.fillRect(jose.x, jose.y, jose.width, jose.height);
	}
})();
Defining the Character
We define José using the Javascript Object Literal Syntax. We define an object that contains information about the location of the character using the x and y coordinates and the size using width and height as well as a color property that we will see used a bit later on.
Speaking of coordinates maybe we can make José a pirate searching for some treasure! There’s an idea!
var jose = {
	x: 350,
	y: 250,
	width: 100,
	height: 100,
	color: "#F38F1D"
};
Our Canvas!
After we have defined José, we need to get access to the world, or in this case the Canvas, we have defined in the HTML. The next two lines get both the canvas element and then from that the 2d context we can use for drawing 2d Shapes:
var canvas = document.getElementById('world');
var ctx =  canvas.getContext('2d');
The context object, ctx, is what we will use to do most of the world rendering and character creation in the series. What we see above is a very basic way to get access to the 2d context of the Canvas element.
After we get both the canvas and its 2d Context we make a call that starts our Story!
Defining and Drawing the world
In the same fashion we defined our main character we are going to define the world:
var world = {
	color:"#F4F4F4"
}
For start we have defined only the color of the world. Later on we might add/generate some additional properties. It is always good to have our entities separated like this, as we saw in the case of the player. It makes the code a bit more readable and easy to follow.
Drawing the world is very simple! We just tell the context object (ctx) what color to use when drawing anything, in this case world.color . After setting the color we are telling the context to draw a rectangle with some parameters:
ctx.fillStyle = world.color;
ctx.fillRect(0, 0, ctx.canvas.width, ctx.canvas.height);
We are probably going to be using fillRect a lot so let’s take a look at the definition of the function:
void ctx.fillRect(x, y, width, height);
The fillRect Method expects the coordinates of the top left point of the rectangle we want to draw and the width and height of that rectangle starting from that top left point. The coordinates are always relative to where the Canvas actually is drawn on the screen.
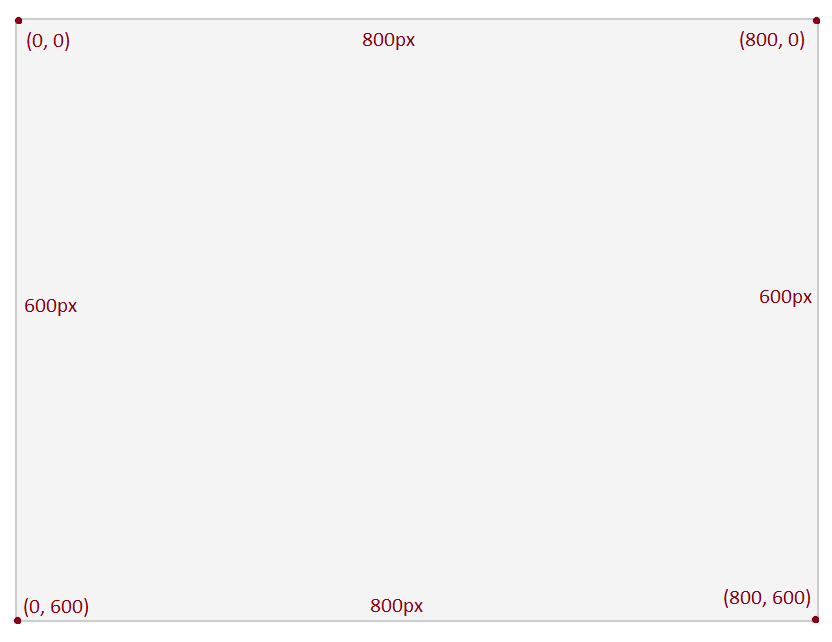
From our actual call we can see that we are starting at coordinates (0, 0) and fill out out the entire world centered in the HTML page with a light gray rectangle rectangle
It’s important to know how the drawing and the coordinate system works in the Canvas API. The following image shows just the current world and its dimensions as well as some marginal points and dimensions:
Drawing the Character
Following the above example and what we know about the coordinate system we can draw the character onto the world.
function drawJose(){
	ctx.fillStyle = jose.color;
	ctx.fillRect(jose.x, jose.y, jose.width, jose.height);
}
Again we are using the Context object to set the color with which we will be drawing, in this case a nice orange color! The difference with the previous fillRect call is that now we are using the parameters we have defined on our character object for the dimensions and the position.
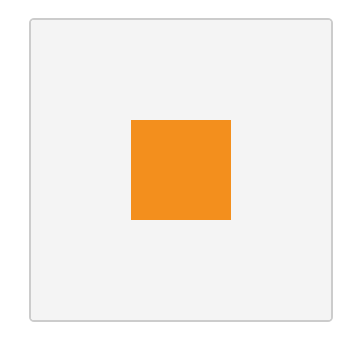
The world should now be a nice gray world with our character dead smack in the middle of it:
The reason José is nice and centered is because we used a little bit of math to figure out where the x and y coordinates should be taking into account the dimensions of the world and the dimensions of the character! Basically at the middle x and y points of the world minus the half of the characters width and height respectively.
And just to make sure everything is working we can change how we define the character just to see how it affects the world. So if we set the character object to:
var jose = {
	x: 20,
	y: 400,
	width: 250,
	height: 80,
	color: "#692428"
};
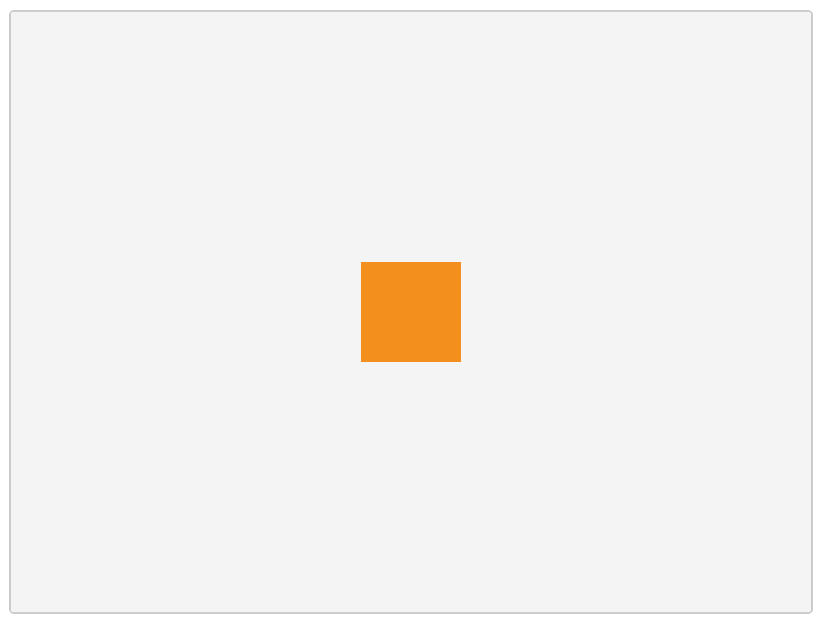
This will result to the world in the following state:

Which brings up another idea?! Maybe the character can change color and shape depending on certain power ups or abilities the player learns along the way!
Now at this point we have our world and we have our character and we can begin telling our story! Actually, we can just just maybe slowly start exploring where the story will go! And for that we need to add something a bit extra to our character!
What is Next!?
The next part of the series will revolve mostly around making our main character move, so we can explore the world!
We will start looking at ways to do simple animation and controls and get things moving! Literally!
I hope some people might find this interesting. Even though this first initial post might seem very familiar and boring I promise things are going to get move exciting once we start moving stuff around the screen!
The Code and the Demo!
The Code can be found at the following GitHub repository, under Part 1, and the example world can be found here!