Recently I’ve started playing around with a Raspberry Pi. The Pi in itself is just a mini computer and you can’t really do anything interesting on it you can’t do on any other PC.
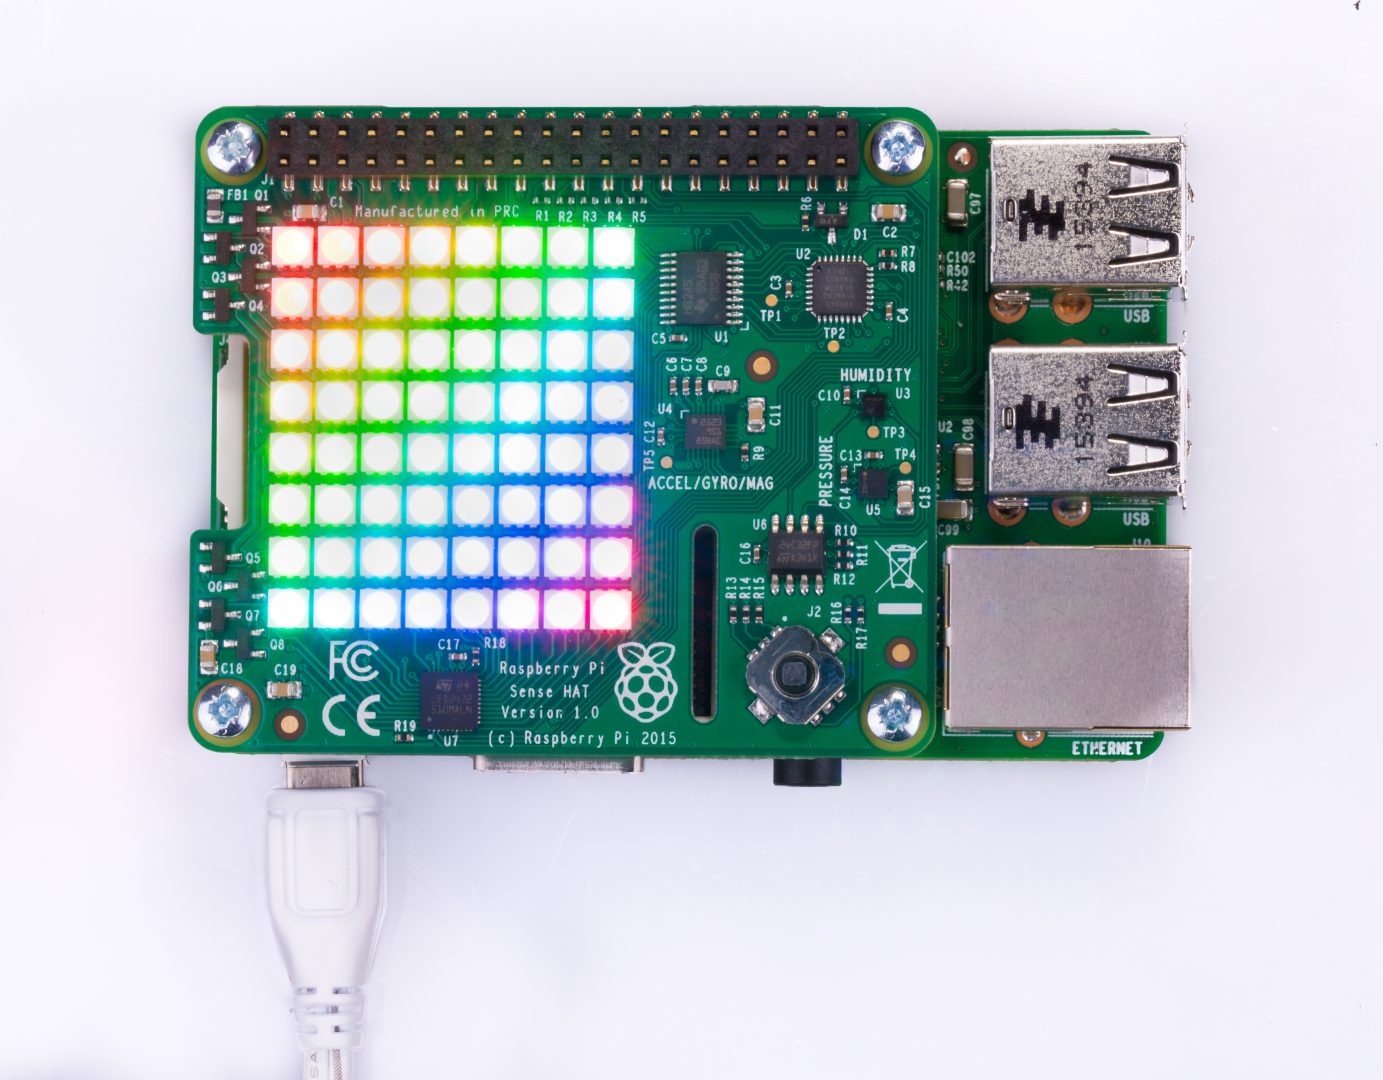
What makes it interesting though is the Sense Hat Module I got which adds some interesting hardware interfaces you can use to make it a nice hobby toolkit!
The Sense Hat among a bunch of other input sensors also contains a 8x8 LED and a 4 way Joystick (with a button). These little two sub-modules will be the focus of this short post.
I will try to cover how I initially setup the PI and what I used to create a simple interactive interface between the two components.
Basically we will be looking at a way to move a single pixel, the player, on the LED matrix using the 4 way joystick. Additionally if the “user* clicks on the button they will be able to get a new random color for the player pixel! Simple!
Note: that this is not meant to be a post discussing features of Node, Typescript or the Raspberry. It will be a quick and dirty look at the configuration and jump straight into the code!
Programming language of choice
The Pi can be programmed and interacted with in a bunch of languages with Python taking the lead in the number of available modules. For a started it might be the better choice!
I wanted to do something different here and use JavaScript together with Node and combine that with TypeScript. I’ve been wanting to get into TypeScript for some time now and these little experiments proved to be a good way to learn while doing.
And as we will see Node and NPM turned out to be quite powerful and contained a lot of modules for interacting with the different hardware elements which was initially a concern of mine!
Setting up the PI for development
There’s a lot of articles and materials online on setting up the Pi. Initially I had to connect a mouse/keyboard monitor to configure the remote workflow but after setting it up I’ve been using Remote Desktop on my PC to connect and run code while using a Shared Drive on the PI on my network as the location for the code.
I was then able to access and edit the code files with a code editor on my local PC. Working via the remote can be quite laggy so being able to edit files from a local editor is a must and makes the experience much more enjoyable.
I will not get into detail about the entire configuration as it’s been very extensively covered. As a reference, this is a series of posts that goes into setting up a Pi for remote development including Node:
Setting up a raspberry PI for remote Node Development
Setting up TypeScript with Node
First things first! Actually installing TypeScript is done using NPM and I installed it both globally on the Pi and locally on the project level.
This was done using NPM, so no big surprise there!
After doing that I started researching Node libraries for interacting with the Sense Hardware. After looking at some examples online and browsing the main NPM repository I came the Node Sense Hat package.
I also researched and setup a simple NPM start script which compiles and runs the main typescript file. This both compiles the file using the typescript compiler and uses the compiled output as the Node input!
The final package.json file:
{
  "name": "node_ts",
  "version": "1.0.0",
  "description": "NodeTypescriptSetup",
  "main": "index.js",
  "scripts": {
      "start": "tsc ./src/index.ts && node ./src/index.js"
  },
  "author": "EmirOsmanoski",
  "license": "MIT",
  "dependencies": {
    "@types/node": "^8.0.16",
    "node-sense-hat": "0.0.2",
    "typescript": "^2.4.2"
  }
}
Typescript configuration
Like with most points in this post here is a bunch of articles out there on configuring TypeScript after you’ve actually installed it. After short research turns out the setup was very simple for what I was trying to do.
As it can be seen in the package.json file I had to install typings for Node.
The typing’s are configuration files for a given library (or runtime like Node) that provide all the cool stuff that Typescript is known for: Type Checking, Intellisense and so on!
After installing the Node typing I needed to configure the TypeScript compiler to basically tell it where it can find the those files among other things:
{
  "compilerOptions": {
    "target": "es5",
    "module": "commonjs",
    "strict": true,
    "typeRoots": [
      "node_modules/@types"
    ],
    "types": [
      "node"
    ]
  }
}
Some of the other options that can be seen here are covered in the official TypeScript Documentation
Code
Let’s take a look at some code now! We will start by looking at the static key/value pair classes and utilities we use in the main module and then cover some of the more involved parts.
Constants and Configuration
This is where TypeScript starts to shine! The benefits of a typed system and being able to easily define object oriented structures with all the good stuff like the static values, private variables and so on.
Remember that everything here is achievable by using regular JavaScript. TypeScript makes it so much easier! And I find it interesting to compile these files and look at the output JavaScript and compare that with maybe how I would’ve implemented the “feature” using pure JavaScript!
Reading the specification for the Joystick module we know that the input is translated into strings based on the direction the stick is pushed (including downwards which registers as a click).
So it makes sense to define a class containing the values for easier reference:
export class Keys {
    public static Up = "up";
    public static Down = "down";
    public static Left = "left";
    public static Right = "right";
    public static Click = "click";
}
And because we have a LED matrix that can output different colors I defined a Color Utility class, that besides having some constant defined colors provides the option of generating a random color:
export class Colors {
    public static White: Array<number> = [255, 255, 255];
    public static Off: Array<number> = [0, 0, 0];

    public GetRandomColor(): Array<number> {
        var color =
        [
            this.getRandomInRange(0, 255),
            this.getRandomInRange(0, 255),
            this.getRandomInRange(0, 255)];
        console.log(color);

        return color;
    }

    private getRandomInRange(min: number, max: number): number {
        return Math.floor(Math.random() * (max - min + 1)) + min;
    }
}
These are our two initial files defined as keys.ts and colorts.ts.
Node Application/Module Entry Point
Next we will take a look at the Node entry point. I wanted to make this as simple as possible and just have a startup class that loads up and initialized an object that will actually do all the work.
import { LedNavigationController } from './sense/LedNavigationController';

class Startup {
    public static main(): number {
        console.log("Started");
        new LedNavigationController().boot();
        return 0;
    }
}

Startup.main();
The above file is defined as index.ts and is actually the file which gets compiled and started using the npm start command from the package.json file we looked at earlier.
I actually need to do some more research both into Node and TypeScript to figure out if the above is the best approach to handle the startup! Initially it looked quite reasonable and it even allowed me to quickly change the “Controller” to try out different examples.
The other controller and its functionality can be seen in the code example repository which can be found at the end of the post
We will be taking a look at the actual controller doing all the work next!
Led Navigation Controller
The Led navigation controller is a relatively bigger file and we will look at its definition piece by piece to better discuss some of its parts.
Imports
First let’s take a look at how we import and declare are dependencies including the constants that were defined above:
var senseLed = require("sense-hat-led");
var senseJoystick = require('sense-joystick');

import { Colors } from '../constants/colors';
import { Keys } from '../constants/keys';
Here I actually ran into my first problem when setting this up. The first two lines are the dependencies on the node module for actually handling the hardware communication. These two declarations use the node require global module to bring in the dependency. We can do this in the TypeScript file as TypeScript itself is a superset of regular JavaScript so we can use everything we actually get with Node for example.
This approach needed to be taken because there are no typings for the Sense Hat Hardware Modules that would allow us to use them using the TypeScript import.
The second two declarations use the regular typescript import syntax by referencing the files where we export the Colors and Keys classes.
The Controller
The next part is the actual LedNavigationController class that we then import and use in the index.ts:
export class LedNavigationController {
    // reference to our color service
    private colorService = new Colors();

    // the current x and y position of the 'player'
    private x: number = 0;
    private y: number = 0;

    // led matrix configuration
    private readonly xMax: number = 8;
    private readonly yMax: number = 8;

    // reference to the pixel matrix
    private pixelMatrix: Array<Array<number>>;

    // the color for the `player`
    private playerColor: Array<number> = [255, 255, 255];

    // More Code - Including the boot method used in index.tx
    // ....
}
We define several private variables for storing the state we need, so we can track our hardware related inputs and outputs. We also create an instance of the color service that will provide us with the utilities we need to handle the LED matrix.
Here once again TypeScript shines by allowing us to declare the types for these variables. This of course makes it a lot harder for us to make mistakes caused by mistyping.
Even though the actual hardware interface bits are not written in TypeScript we benefit from the type checking. Our code will not allow us to pass in alphanumeric characters for the color values for example which potentially means a thrown exception from the LED module.
Utility Method: Reset Matrix
The first method we will look at is the resetMatrix() which handles clearing the colors on the pixelMatrix Arrays used to track the current state of the LED matrix.
Here we treat each LED as a pixel. The value of the pixel is tracked by an array of three numbers and then the set of all pixels is an array of 64 such arrays.
Reset matrix set’s all those values to the Off color which as we saw in the Colors utility is basically [0,0,0]:
private ResetMatrix() {
        this.pixelMatrix = new Array<Array<number>>();

        for (var index = 0; index < this.xMax * this.yMax; index++) {
            this.pixelMatrix.push(Colors.Off);
        }
    }
What I like here is how readable and easy it is to do this with TypeScript. Right off the bat we can have this constant value called Off which at the same type is also type checked by the compiler and no one can change it to a number or an object (which is something we can do in just pure JavaScript).
Utility Method: Set Current Position
Because we store the current State of the LED Matrix as a one dimensional array we need a way to translate the X, Y position of the “player” pixel into an index in the array:
 private SetCurrentPosition(x: number, y: number) {
/*
    Given the following array and coordinates [1,1]
    [
        0, 0, 0, 0,
        0, X, 0, 0,
        0, 0, 0, 0,
        0, 0, 0, 0,
    ]

    we need to calcualte the actual position in the one dim array:

    Formula:
    index = x * yMax + y

    Given xMax = 4 and yMax = 4

    index = 1 * 4 + 1 = 5

    Test Cases:
    [0, 0] = 0;
    [3, 3] = 13;
*/

var index = x * this.xMax + y;
this.pixelMatrix[index] = this.playerColor;
}
Pretty straightforward! Note the type declaration on the signature of the method which is another layer of safety. The access on pixelMatrix (pixelMatrix[index]) is always going to be a number!
After reviewing the utility methods and internal variables we can look at the boot method that actually handles the entire logic of what we are trying to do!
Boot!
public boot() {

// 1. initially rset the matrix
this.ResetMatrix();

// 2. initially set the current position
this.SetCurrentPosition(this.x, this.y);

// 3. the first hardware call! Push the pixelMatrix to the senseLed
senseLed.setPixels(this.pixelMatrix);

// 4. second hardware call!
// Register a handler on the joystick press event which gives us the direction.
senseJoystick.getJoystick()
    .then((joystick: any) => {
        joystick.on('press', (direction: any) => {
            switch (direction) {
                // 5. We use the Keys constant to determine the key
                // that was pressed and change position accordingly.
                case Keys.Left:
                    this.y--;
                    if (this.y < 0) {
                        this.y = 0;
                    }
                    break;
                case Keys.Right:
                    this.y++;
                    if (this.y > this.yMax - 1) {
                        this.y = this.yMax - 1;
                    }
                    break;
                case Keys.Up:
                    this.x--;
                    if (this.x < 0) {
                        this.x = 0;
                    }
                    break;
                case Keys.Down:
                    this.x++;
                    if (this.x > this.xMax - 1) {
                        this.x = this.xMax - 1
                    }
                    break;
                case Keys.Click:
                    this.playerColor = this.colorService.GetRandomColor();
                    break;
                default:
                    // noop
                    break;
            }

            // 6. Do some logging

            console.log('Got button press in the direction: ', direction);
            console.log("Current X: " + this.x);
            console.log("Current Y: " + this.y);

            // 7. Reseting the Matrix and player position after handling inputs
            this.ResetMatrix();
            this.SetCurrentPosition(this.x, this.y);

            // 8. Updating the hardware LED state with the
            //    current internal pixelMatrix state
            senseLed.setPixels(this.pixelMatrix);
        });
    });
}
Besides the comments which cover most of things there are two things that stand out:
- At point 4 getJoystick returns a promised that is resolved when the joystick object is ready/initialized. This is handled internally by the Joystick API we are using. Once that is ready we can use .on exposed by the API to register our handler
- Both at 3 and 8 we are using the LED API to push the state we are tracking internally via pixelMatrix to the actual LED matrix on the device.
For reference the full file:
var senseLed = require("sense-hat-led");
var senseJoystick = require('sense-joystick');

import { Colors } from '../constants/colors';
import { Keys } from '../constants/keys';

export class LedNavigationController {
    private colorService = new Colors();

    private x: number = 0;
    private y: number = 0;

    private readonly xMax: number = 8;
    private readonly yMax: number = 8;

    private pixelMatrix: Array<Array<number>>;

    private playerColor: Array<number> = [255, 255, 255];

    private setLed(color: Array<number>) {
        senseLed.clear(color);
    }

    private ResetMatrix() {
        this.pixelMatrix = new Array<Array<number>>();

        for (var index = 0; index < this.xMax * this.yMax; index++) {
            this.pixelMatrix.push(Colors.Off);
        }
    }

    private SetCurrentPosition(x: number, y: number) {
        var index = x * this.xMax + y;
        this.pixelMatrix[index] = this.playerColor;
    }

    public boot() {
        // 1. initially rset the matrix
        this.ResetMatrix();

        // 2. initially set the current position
        this.SetCurrentPosition(this.x, this.y);

        // 3. the first hardware call! Push the pixelMatrix to the senseLed
        senseLed.setPixels(this.pixelMatrix);

        // 4. second hardware call!
        // Register a handler on the joystick press
        // event which gives us the direction.
        senseJoystick.getJoystick()
            .then((joystick: any) => {
                joystick.on('press', (direction: any) => {
                    switch (direction) {
                        // 5. We use the Keys constant to determine the key
                        // that was pressed and change position accordingly.
                        case Keys.Left:
                            this.y--;
                            if (this.y < 0) {
                                this.y = 0;
                            }
                            break;
                        case Keys.Right:
                            this.y++;
                            if (this.y > this.yMax - 1) {
                                this.y = this.yMax - 1;
                            }
                            break;
                        case Keys.Up:
                            this.x--;
                            if (this.x < 0) {
                                this.x = 0;
                            }
                            break;
                        case Keys.Down:
                            this.x++;
                            if (this.x > this.xMax - 1) {
                                this.x = this.xMax - 1
                            }
                            break;
                        case Keys.Click:
                            this.playerColor = this.colorService.GetRandomColor();
                            break;
                        default:
                            // noop
                            break;
                    }

                    // 6. Do some logging

                    console.log('Got button press in the direction: ', direction);
                    console.log("Current X: " + this.x);
                    console.log("Current Y: " + this.y);

                    // 7. Reseting the Matrix and player position
                    //    after handling inputs
                    this.ResetMatrix();
                    this.SetCurrentPosition(this.x, this.y);

                    // 8. Updating the hardware LED state with the
                    //    current internal pixelMatrix state
                    senseLed.setPixels(this.pixelMatrix);
                });
            });
    }
}
Demo
The final output of the above code can be seen in the following video:
The flickering of the LED is an artifact from the Video Capture device and is not representative of reality :)
Summary and Code
Overall this was a fun little experiment and intro to TypeScript. It was also a good intro to the hardware and to some new parts of the NPM ecosystem.
I’ve titled this post as Part 1 because I hope to be able to write a short series of articles capturing my journey into TypeScript and much further down the line the later versions of Angular.
My big idea is to build a web interface that should allow multiple users to somehow edit the colors on the LED matrix and have it update the actual hardware in real time. And I’m hoping to use the web component in the story to finally start learning Angular 4, or whatever version is currently latest :)
Finally, like almost everything else on the blog the code examples are available at this repository
Until next time!