Welcome to the final part of our Roslyn Adventure where we will cover the simple fix provider for our sample problem presented and analyzed in the previous two parts:
We will be implementing a fix provider that is going to modify our code by replacing the multiple calls of a method with a variable which will store the returned result from the very first call.
As in the previous article covering the analyzer, we will start to get familiar
with the Fix Provider Roslyn API through the sample provided with the Analyzer
with Code Fix Provider Template.
Template Default setup
The previous article already fully covered the Problem & Analyzer for the template project. We will only recap that the DiagnosticId property of the issue/diagnostics reported by the analyzer we looked at is:
public const string DiagnosticId = "UpperCaseType";
Fix Provider Overview
Like how we can register an Analyzer we start with a Fix Provider Type that
inherits from the base
CodeFixProvider:
[ExportCodeFixProvider(LanguageNames.CSharp, Name = nameof(UpperCaseTypeCodeFixProvider)), Shared]
public class UpperCaseTypeCodeFixProvider : CodeFixProvider
{
   public sealed override ImmutableArray<string> FixableDiagnosticIds
   {
      get { return ImmutableArray.Create(UpperCaseTypeAnalyzer.DiagnosticId); }
   }

   public sealed override FixAllProvider GetFixAllProvider()
   {
      return WellKnownFixAllProviders.BatchFixer;
   }

   // ... MORE CODE TO FOLLOW
}
Note: Depending on the Templates and Visual Studio versions
used the Template will either contain the Fix Provider in the project as
the Analyzer or it will be in its own project in the solution UpperCaseType.CodeFixes
There are several note points to consider here:
- We inherit from
CodeFixProvider. - We
ExportCodeFixProviderby decorating the class with the attribute. - We define which Diagnostics we can provide fixes for by overriding the
FixableDiagnosticIdsproperty. - We define the
FixAllProvidersetting - which determines how this fix is applied to multiple errors. This uses the default Batch Fixer. More information here.
Registering Code Fixes
The next part of the code overview will look at the RegisterCodeFixesAsync method:
public sealed override async Task RegisterCodeFixesAsync(CodeFixContext context)
{
   var root = await context.Document.GetSyntaxRootAsync(context.CancellationToken).ConfigureAwait(false);

   // TODO: Replace the following code with your own analysis, generating a CodeAction for each fix to suggest
   var diagnostic = context.Diagnostics.First();
   var diagnosticSpan = diagnostic.Location.SourceSpan;

   // Find the type declaration identified by the diagnostic.
   var declaration = root.FindToken(diagnosticSpan.Start).Parent.AncestorsAndSelf().OfType<TypeDeclarationSyntax>().First();

   // Register a code action that will invoke the fix.
   context.RegisterCodeFix(
         CodeAction.Create(
            title: CodeFixResources.CodeFixTitle,
            createChangedSolution: c => MakeUppercaseAsync(context.Document, declaration, c),
            equivalenceKey: nameof(CodeFixResources.CodeFixTitle)),
         diagnostic);
}
Note: This is a method that is called each time an engineer “starts” to bring up the contextual menu with all the potential fixes for a given diagnostic/”issue”. This method allows us to register one or multiple potential code fixes that the user can decide to apply.
The key argument is the CodeFixContext. It’s a struct which contains a collection of objects we can use to perform some important actions.
We start of by first getting the SyntaxRoot for our code file which contains at least one diagnostic from those we have specified in the FixableDiagnosticIds property.
We now want to get some additional information around the code for which we’ve reported the diagnostic.
We do this by accessing the context.Diagnostics collection’s first element. We can use use the first element because our FixableDiagnosticIds registers to address one diagnostic and we tend to always expect this array to have one element.
Note: The note on the description of context.Diagnostics states that all the diagnostics in the collection apply to the same Span. This refers to one area of code to fix. This means that potentially we might have multiple diagnostics reported for the same area of code based on the FixableDiagnosticIds
Moving forward we have the following lines:
var diagnosticSpan = diagnostic.Location.SourceSpan;

// Find the type declaration identified by the diagnostic.
var declaration = root.FindToken(diagnosticSpan.Start).Parent.AncestorsAndSelf().OfType<TypeDeclarationSyntax>().First();
From the first reported diagnostic we get the Location.SourceSpan property which we use to look through the Syntax Root and in this case find the first matching TypeDeclarationSyntax.
This gives us the SyntaxNode which contains the lower-case type declaration.
Note: The Sample problem we are looking for treats any Type Declaration that contains at least one lower-case character as a problem that is reported by a diagnostic and we will see, fixed by upper-casing the entire name of the Type.
After we find the node we can finally call RegisterCodeFix to explicitly register a fix for that specific Type Declaration.
If for some reason we can’t apply code fixes to all of our diagnostics based on certain conditions, we can opt out of this step and not register the Code Fix after checking our conditions.
We use CodeAction.Create with the following important line:
createChangedSolution: c => MakeUppercaseAsync(context.Document, declaration, c)
We set the createChangedSolution parameter to be a function that can be called which in turn calls MakeUppercaseAsync with the parameters we supply.
Note: The alternative to createChangedSolution is the createChangedDocument parameter which would allow us to change only the single document with the reported diagnostic. But if we think about the nature of this sample problem we want to also change every occurrence of the Type Declaration that might appear in other documents.
Note: For another overview of registering fix providers have a look at this link which goes through a different sample problem based off the same template.
Next let’s take a quick look at how we actually change our code.
Applying Code Fixes
Our MakeUppercaseAsync(context.Document, declaration, c) is going to modify source code! And it is invoked from two contexts:
- Previewing: When the user wants to action/address the Diagnostic - through the Quick Actions or through hovering on the Squiggly lines in the IDE. This does not apply the fix but calls the method to generate the new code so that the user can preview the fixed code.
- Applying: When the user, happy with the preview actually applies the fix. This is the point where we start modifying source code!
The MakeUppercaseAsync method is straightforward and uses powerful Roslyn API features to generate a new solution with our applied fix:
private async Task<Solution> MakeUppercaseAsync(Document document, TypeDeclarationSyntax typeDecl, CancellationToken cancellationToken)
{
   // Compute new uppercase name.
   var identifierToken = typeDecl.Identifier;
   var newName = identifierToken.Text.ToUpperInvariant();

   // Get the symbol representing the type to be renamed.
   var semanticModel = await document.GetSemanticModelAsync(cancellationToken);
   var typeSymbol = semanticModel.GetDeclaredSymbol(typeDecl, cancellationToken);

   // Produce a new solution that has all references to that type renamed, including the declaration.
   var originalSolution = document.Project.Solution;
   var optionSet = originalSolution.Workspace.Options;

   var newSolution = await Renamer.RenameSymbolAsync(document.Project.Solution, typeSymbol, newName, optionSet, cancellationToken).ConfigureAwait(false);

   // Return the new solution with the now-uppercase type name.
   return newSolution;
}
What we start of doing is fetching the identifier name (the type name) as defined at the moment with some lower-case character through the TypeDeclarationSyntax.
We then create a “fixed” name by transforming the identifier. Text property with `ToUpperInvariant’:
// Compute new uppercase name.
var identifierToken = typeDecl.Identifier;
var newName = identifierToken.Text.ToUpperInvariant();
The following four lines fetch setup objects we will need to fully generate the “new solution”.
We use the SemanticModel to fetch the TypeSymbol which gives us information about this Type Declaration throughout the whole solution.
We use the typeSymbol as a parameter to the Renamer.RenameSymbolAsync method as the symbol we want renamed.
The documentation for the Renamer class and the RenameSymbolAsync is not very detailed, but based on the API we can see that it will return Solution object.
In our case the typeSymbol will be assigned the newName in the active
document.Project.Solution.
The Renamer class is very powerful and very suited for this
specific example scenario.
After we have our newSolution we return it as the result of our CodeAction. Our solution and every reference to the Type Declaration will now reference and use an uppercase name.
Let’s now have a look at the Fix Provider for the Sample Problem used throughout this series.
Fixing Multiple Method Invocations
Our custom fix provider follows the same pattern and initial setup by registering what the FixableDiagnosticIds are:
public sealed override ImmutableArray<string> FixableDiagnosticIds =>ImmutableArray.Create(Analyzer.DiagnosticId);
Our RegisterCodeFixesAsync is also very similar to the template:
public sealed override async Task RegisterCodeFixesAsync(CodeFixContext context)
{
   var root = await context.Document.GetSyntaxRootAsync(context.CancellationToken).ConfigureAwait(false);

   // getting first because we are only listening to a single diagnostic here
   // !important - we might have multiple diagnostics of the same type here for different places and methods in the code
   var diagnostic = context.Diagnostics.First();

   var diagnosticSpan = diagnostic.Location.SourceSpan;

   // Find the type invocation identified by the diagnostic.
   var invocation = root.FindToken(diagnosticSpan.Start).Parent.AncestorsAndSelf()
         .OfType<InvocationExpressionSyntax>().First();

   // Register a code action that will invoke the fix.
   context.RegisterCodeFix(
         CodeAction.Create(
            title,
            c => CombineMethodUsageAsync(context.Document, invocation, c),
            title),
         diagnostic);
}
The important differences to note here is that we are looking for a
InvocationExpressionSyntax on which we will register the Code Fix, instead of
the TypeDeclarationSyntax as in the template.
Additionally, we register a Code Action that will call CombineMethodUsageAsync on just
the current active document, instead of the solution.
We will now look at the CombineMethodUsageAsync! ![]()
Note: Similar to the Analyzer the Code Fix Provider is a fairly simplified solution and sometimes might provide fixes that result in errors. This is something that a Code Fix should never do and some of these scenarios will be pointed out as we look at examples.
Intro to CombineMethodUsageAsync
The general approach to providing the code fix is going to be:
- Get the full list of all invocations of the function/method we want to address within the given code block.
- Look at the first method/function invocation as it appears in the method block.
- If the result of the first invocation is part of a local variable declaration storing the result in the variable proceed to step 5.
- If the result of the first invocation is not stored in a variable - introduce a variable that will store the result and proceed to step 5.
- Go over the remaining invocations of the method/function and replace them withe the variable defined either in 3) or 4).
Before moving forward let us first re-introduce the very simple and slightly modified example from Part 2 that we can use as the example “real world” code.
class Program
{
   static void Main(string[] args)
   {
      var input = 4;
      int y;

      int x = Foo(input);
      y = Foo(input);

      Console.WriteLine(x);
      Console.WriteLine(y);
   }

   static int Foo(int i)
   {
      return 4;
   }
}
Let us see what we setup as our first step in order to do our checks in step 2:
private async Task<Document> CombineMethodUsageAsync(Document contextDocument,
            InvocationExpressionSyntax invocationRequestingFix,
            CancellationToken cancellationToken)
{
   // need to get all occurrences of the invocation of our method
   var expressionName = invocationRequestingFix.Expression.ToString();
   var documentEditor = await DocumentEditor.CreateAsync(contextDocument, cancellationToken);

   // find all of the Invocation Expression matching the expression name
   var originalInvocationsMatchingFixRequestInvocation = documentEditor
      .OriginalRoot
      .DescendantNodes()
      .OfType<InvocationExpressionSyntax>()
      .Where(x => x.Expression.ToString().Equals(expressionName))
      .Where(
         // only find the expression that are within the same code block
         x=>
         x.FirstAncestorOrSelf<SyntaxNode>(t=>t.IsKind(SyntaxKind.Block))
         == invocationRequestingFix.FirstAncestorOrSelf<SyntaxNode>(t => t.IsKind(SyntaxKind.Block)))
      .ToList();

   // if there is only one invocation
   if (originalInvocationsMatchingFixRequestInvocation.Count <= 1) return contextDocument;

   // assume the first invocation is assigned to a variable and will be skipped
   // variable is determined in next line of code.
   var originalInvocationsToSkipWhenFixing = 1;

   var variableIdentifier =
      CheckIfFirstInvocationAssignedToVariableAndReturnVariableIdentifier(
         originalInvocationsMatchingFixRequestInvocation);

   //.... MORE CODE
}
We initially get the expressionName of the invocation for which our Analyzer discovered multiple calls with the same parameters.
If we look at the simple example that would be the name of the method: Foo.
We then create the object that will help us make all the changes in the code. The documentEditor.
What we do next is find all invocations within the current block that
match the expression by using the OriginalRoot on the documentEditor and
matching on the expressionName. We additionally filter all the invocations to those that share the same ancestor block as the invocation for which the diagnostic was reported.
If the count of such invocations is one, we don’t really need to provide a fix.
The last line calls the
CheckIfFirstInvocationAssignedToVariableAndReturnVariableIdentifier function
that returns the variable syntax we will use to perform the check in step 2).
Check initial invocation variable
Let us have a look at the CheckIfFirstInvocationAssignedToVariableAndReturnVariableIdentifier:
 private static SyntaxToken CheckIfFirstInvocationAssignedToVariableAndReturnVariableIdentifier(
            List<InvocationExpressionSyntax> allInvocationExpressions)
{
   // we need the first invocation
   var firstInvocation = allInvocationExpressions.First();

   // get the top level "invocation" container
   var topLevelInvocationContainer = GetNodeTopLevelContainerThatIsChildOfCodeBlock(firstInvocation);

   // The variable identifier of the first element
   var variableIdentifier = new SyntaxToken();

   // check if it is a variable declaration meaning that we will have a variable we can re-use
   if (topLevelInvocationContainer.IsKind(SyntaxKind.LocalDeclarationStatement))
   {
         var variableDeclarator =
            topLevelInvocationContainer
               .DescendantNodes().ToList().Where(x => x.IsKind(SyntaxKind.VariableDeclarator))
               .FirstOrDefault() as VariableDeclaratorSyntax;

         variableIdentifier = variableDeclarator.Identifier;
   }

   return variableIdentifier;
}
The function is a simplified check that relies on our first method invocation
being part of a LocalDeclarationStatementSyntax Syntax Node.
The slight change mentioned that we made to our Foo() example was specifically made to match the LocalDeclarationStatementSyntax check.
For a better view of what is going on let us have a look at the Syntax Visualizer to identify the full hierarchy for the first invocation of the Foo Method:
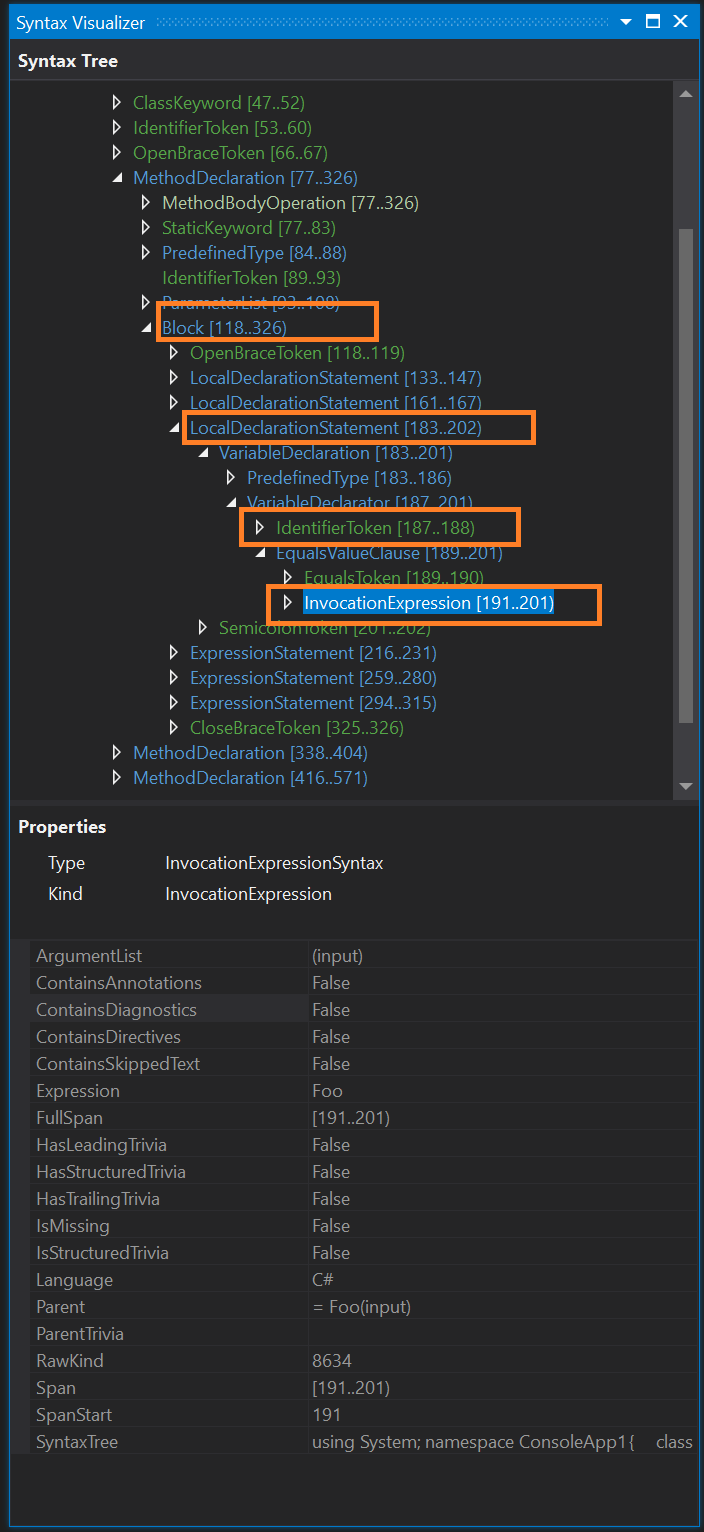
What CheckIfFirstInvocationAssignedToVariableAndReturnVariableIdentifier does is try to return a VariableIdentifier from a VariableDeclaratorSyntax by looking at the top-most Syntax Node that is a child of the Code Block which contains our Invocation Expression.
If no such node exists - we return a default “empty” SyntaxToken. Otherwise, we return the IdentifierSyntax we found.
The GetNodeTopLevelContainerThatIsChildOfCodeBlock(firstInvocation) method is very simple and just traverses the Invocation Syntax Node ancestors finding the first node that is a child of a Block Syntax Node.
private static SyntaxNode GetNodeTopLevelContainerThatIsChildOfCodeBlock(SyntaxNode node)
{
   return node.FirstAncestorOrSelf<SyntaxNode>(x => x.Parent.IsKind(SyntaxKind.Block));
}
Note This is a method that is simplified and relies on our invocation being part of a LocalDeclarationStatement. This can be improved by including additional checks and potentially semantic analysis that would work beyond just this simple example.
Let’s now quickly have a look at what we would do if the first invocation is not
part of a Local DeclarationStatement
Introducing a variable if first Invocation is not part of Local Declaration
In the previous section we try and identify a variable that we can use for our method replacement. If the first invocation is not part of a LocalDeclarationStatement we fail to find such a variable and we basically return A Syntax Token with its Kind set to SyntaxKind.None.
In this case we proceed to generate our own Syntax and our own variable.
var variableIdentifier =
      CheckIfFirstInvocationAssignedToVariableAndReturnVariableIdentifier(
         originalInvocationsMatchingFixRequestInvocation);

// ... PREVIOUS CODE
// this means the first invocation of multiple is not assigned to a variable
// we will have to create a new invocation and assign it to a variable we can use to replace
// all the other invocations
if (variableIdentifier.IsKind(SyntaxKind.None))
{
      var variableDeclarator = SyntaxFactory
         .VariableDeclarator(GetNewDeclaredVariableForExpression(expressionName))
         .WithInitializer(
            SyntaxFactory.EqualsValueClause(
                  invocationRequestingFix
            )
      );

      // Create the Variable declaration.
      var variableDeclaration = SyntaxFactory.VariableDeclaration(TypeSyntaxFactory.GetTypeSyntax("var"))
         .WithTrailingTrivia(SyntaxFactory.SyntaxTrivia(SyntaxKind.WhitespaceTrivia, " "))
         .WithVariables(SyntaxFactory.SeparatedList<VariableDeclaratorSyntax>().Add(variableDeclarator));

      var localDeclaration = SyntaxFactory.LocalDeclarationStatement(variableDeclaration)
         .WithAdditionalAnnotations(Formatter.Annotation);

      AddLocalDeclarationBeforeFirstReplacedInvocation(originalInvocationsMatchingFixRequestInvocation,
         localDeclaration,
         documentEditor);

      variableIdentifier = variableDeclarator.Identifier;
      originalInvocationsToSkipWhenFixing = 0;
}
// ... MORE CODE
Note: As already stated for us to reach this code we would have to modify the Foo() example and replace int x = Foo(input); with potentially just Foo(input);
This is where we start using a very important class that helps us build our syntax: SyntaxFactory and where we can use the SyntaxVisualizer and the Roslyn Quoter to help us structure the new code.
We initially create the variableDeclarator variable of type VariableDeclaratorSyntax using a new variable name we dynamically build in GetNewDeclaredVariableForExpression.
We initialize the variable using EqualsValueClauseSyntax by setting the expression on the right side of the Equals Clause to the InvocationExpression we are trying to fix.
We are basically building code that assigns the result of our call to the “repeated” method to a new variable.
Note: GetNewDeclaredVariableForExpression is a simple method that generates the new variable name. The variables names it creates follow the pattern: {SANITIZED_FUNCTION_NAME}Result.
For the Foo() example we return the name fooResult. For a full implementation see the full code at the end of the article.
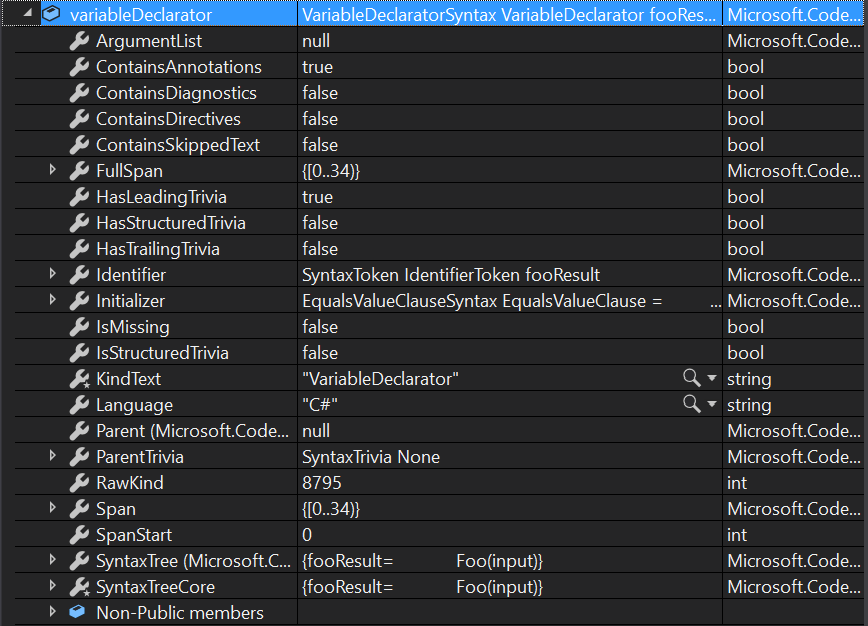
Lets track the syntax we generate step by step. What we have so far is:
fooResult = Foo(input)
And we can see that when debugging the extension:
This is still not fully correct C# syntax. We are missing either the explicit
type for fooResult or the var keyword as well as some additional syntax and
formatting.
We add the missing bits through the following lines:
// Create the Variable declaration.
var variableDeclaration = SyntaxFactory.VariableDeclaration(TypeSyntaxFactory.GetTypeSyntax("var"))
   .WithVariables(SyntaxFactory.SeparatedList<VariableDeclaratorSyntax>().Add(variableDeclarator));

var localDeclaration = SyntaxFactory.LocalDeclarationStatement(variableDeclaration)
   .WithAdditionalAnnotations(Formatter.Annotation);
The variableDeclaration uses the already defined variableDeclarator and adds
a TypeSyntax Node using the var keyword.
Finally, we define the variables we are declaring using WithVariables. In our case this is the
fooResult variable as specified with its variableDeclarator.
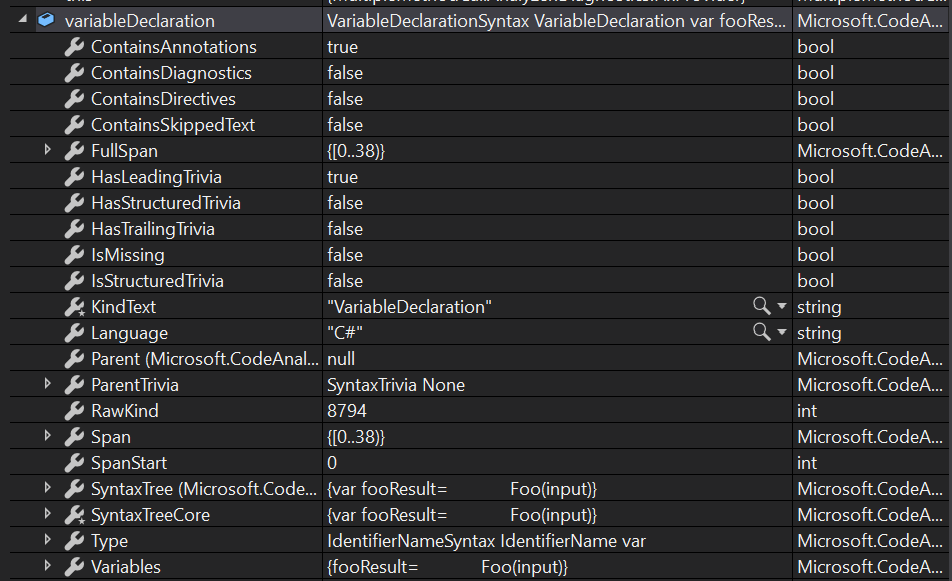
We’ve just updated the syntax we are building to:
var fooResult = Foo(input)
or as it can be seen by the value during debug:
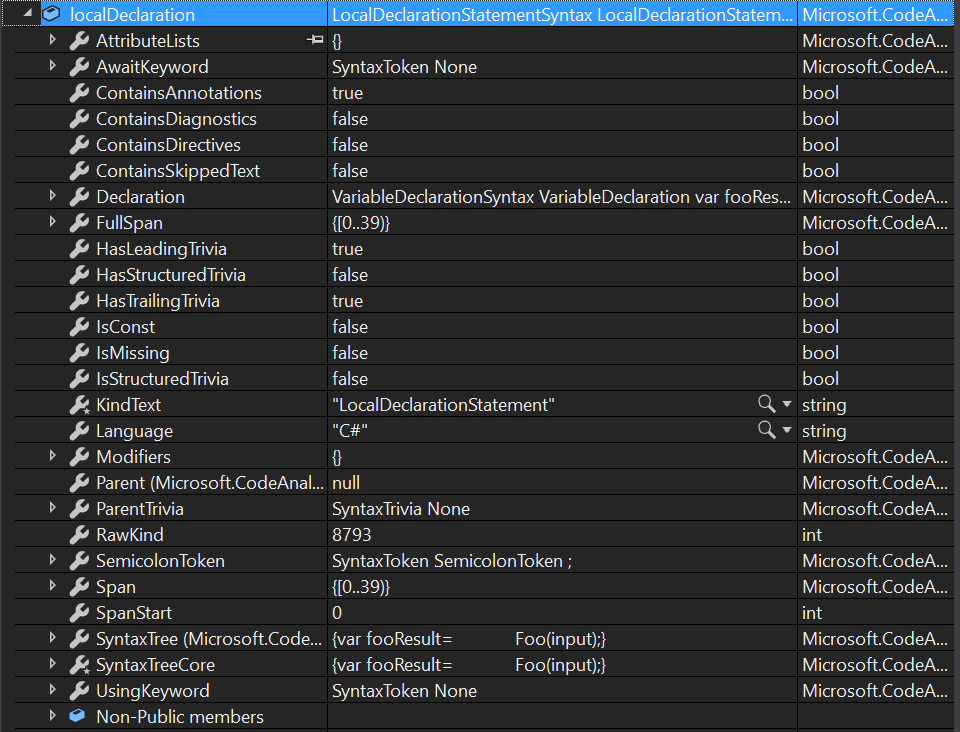
This is still not a fully valid expression because of the missing ;.
So, we further define a localDeclaration
statement
to which we add additional annotations in terms of formatting.
Finally, this creates a valid expression:
var fooResult = Foo(input);
or as it can be seen during debug:
This gives us a statement that we can now insert into our code which will call the “offending” method and store the results in a variable.
We can then use the variable as a replacement for the other calls in the block.
What is left to do now is inject our localDeclaration statement in the code before the first invocation:
AddLocalDeclarationBeforeFirstReplacedInvocation(originalInvocationsMatchingFixRequestInvocation,
localDeclaration,
documentEditor);

variableIdentifier = variableDeclarator.Identifier;
originalInvocationsToSkipWhenFixing = 0;
Once we do that, we set the variableIdentifier object we identified before
and set the value of originalInvocationsToSkipWhenFixing to 0. In a couple of paragraphs, we will see how and why this value is used.
Note: Remember that we are looking at one of two branches in our code where the first invocation of the “offending” method/function is not assigned to a variable through a local declaration. This is code that would not run if the first invocation result was stored in a locally declared variable. In that case originalInvocationsToSkipWhenFixing would be set to the initial value of 1.
The final step we have to do is inject the declaration before the fist invocation though AddLocalDeclarationBeforeFirstReplacedInvocation:
private static void AddLocalDeclarationBeforeFirstReplacedInvocation(
            List<InvocationExpressionSyntax> allInvocationExpressions,
            LocalDeclarationStatementSyntax localDeclaration, DocumentEditor editor)
{
   var firstInvocationOccurrence = allInvocationExpressions.First();

   var firstInvocationTopLevelParent = GetNodeTopLevelContainerThatIsChildOfCodeBlock(firstInvocationOccurrence);

   var locDeclaration = localDeclaration.WithLeadingTrivia(firstInvocationTopLevelParent.GetLeadingTrivia());

   editor.InsertBefore(firstInvocationTopLevelParent, locDeclaration);
}
This is a relatively straightforward way of inserting code using the DocumentEditor.InsertBefore method.
We first get the firstInvocationOccurrence of all the method invocations and use GetNodeTopLevelContainerThatIsChildOfCodeBlock. Remember that this returns the topmost expression containing the InvocationExpression. We want to insert our LocalDeclarationStatementSyntax exactly before this expression.
To make sure we keep the formatting consistent we make sure we keep the Leading Trivia intact.
That is why we create a new local declaration that will use the LeadingTrivia from the node that will come after the declaration. In our case it’s the actual firstInvocationTopLevelParent.
Finally, we use the DocumentEditor and insert our new locDeclaration before the
firstInvocationTopLevelParent.
And with that we are done with adding the variable that would store the result of an initial method call. The DocumentEditor tracks our change and will generate the new syntax when we process all changes at the end.
Variable Identifier Summary
Before moving on let us do a recap of where we are in terms of the original 5 steps.
At this point we can execute the last step which is replacing
all the invocations of the “offending” method with the variable defined in our variableIdentifier.
Let us have a quick example of what variableIdentifier syntax will contain depending on the 2 different first method invocations.
The first code snippet we will look at:
var output = MethodCall(input);
DoSomethingWithThisInput(MethodCall(input));
DoSomethingElseWithThisInput(MethodCall(input));
In this case the variableIdentifier is going to point to output.
That is going to be slightly different in the following scenario:
DoSomethingWithThisInput(MethodCall(input));
DoSomethingElseWithThisInput(MethodCall(input));
Here we go about injecting a newly defined variable in the code before the first “parent” of the MethodCall invocation. In the snippet that is the DoSomethingWithThisInput method. We end up with:
var methodCallResult = MethodCall(input);
DoSomethingWithThisInput(MethodCall(input));
DoSomethingElseWithThisInput(MethodCall(input));
In the next step (covering step 5) we see how we can take the variableIdentifier and replace all possible invocations of the “offending” method, so we end up with the least number of calls and re-use the variable as much as possible.
Replacing Invocations with Variable Identifier
The final part of our CodeAction is as follows:
var invocationsToReplace =
   originalInvocationsMatchingFixRequestInvocation.Skip(originalInvocationsToSkipWhenFixing).ToList();

foreach (var invocation in invocationsToReplace)
{
   var invocationParent = invocation.Parent;

   var newNode = SyntaxFactory.IdentifierName(variableIdentifier.Text);
   var newInvocationParent = invocationParent.ReplaceNode(invocation, newNode);

   documentEditor.ReplaceNode(invocationParent, newInvocationParent);
}

return documentEditor.GetChangedDocument();
We start of by defining invocationsToReplace from the originalInvocationsMatchingFixRequestInvocation collection.
We skip originalInvocationsToSkipWhenFixing items which is either going to be 1 or 0
depending on the use cases described in the previous section.
We then iterate over the invocations and to the following:
- We find the invocation Parent Node which can be different types of
Syntax Nodes. - We create a new
IdentifierNameSyntaxnode from ourvariableIdentifier. - We “create” a New Parent Node by replacing its child
Invocationnode with our newIdentifierNamenode using theReplaceNodemethod. - We use the
documentEditorto replace the originalinvocationParentwhich contains theinvocationwith thenewInvocationParentwhich contains the replacednewNode(theIdentifierName).
Note: The SyntaxNode methods like ReplaceNode are immutable. They don’t modify the node on which we call them. They create new Syntax Nodes based on the changes. We then use the DocumentEditor to apply and track multiple changes/replacements.
As a final step we call and return documentEditor.GetChangedDocument(); which applies our changes to the existing document and returns the results of all our tracked changes.
Note: The DocumentEditor is an important part of the fix as one of its key features is allowing us to do multiple document updates in a single go!
With this our Code Action takes effect and we have fully executed our code fix! ![]() .
.
Warning: This final part of the code is also simplified and is only for example purposes. The replacements do not take into account that potentially some of the invocations might be using different input parameters. The fix provider should either share analysis code with the analyzer to check for parameters or take a different approach potentially using semantic checks to verify exactly which methods to replace.
In Action
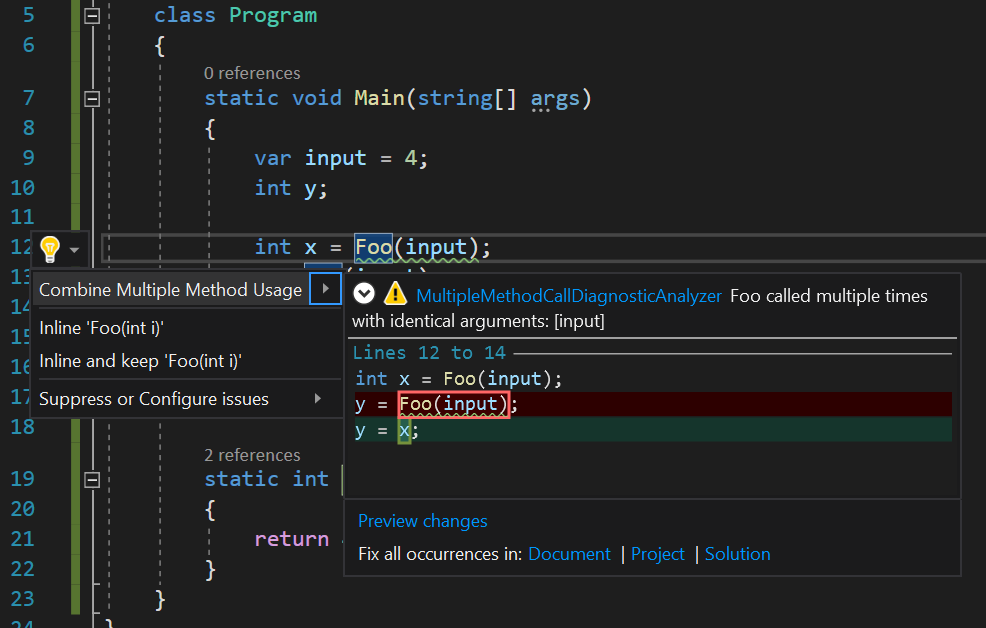
Lets take a look at the fix provider in action using our Foo() method example:
class Program
{
   static void Main(string[] args)
   {
      var input = 4;
      int y;

      int x = Foo(input);
      y = Foo(input);

      Console.WriteLine(x);
      Console.WriteLine(y);
   }

   static int Foo(int i)
   {
      return 4;
   }
}
If we “focus” on our Fix as the solution to the squiggly lines reported by our Analyzer the IDE shows a preview of the code changes:
Applying the fix results in the fixed code with the second invocation being removed and replaced by the value stored in the variable x
class Program
{
   static void Main(string[] args)
   {
      var input = 4;
      int y;

      int x = Foo(input);
      y = x;

      Console.WriteLine(x);
      Console.WriteLine(y);
   }

   static int Foo(int i)
   {
      return 4;
   }
}
Final Code Sample And Wrap Up
The full version of the Fix Provider can be found at the following link:
And with that we finish the series on Roslyn!
As we can see this usage of Roslyn (.NET Compiler Platform SDK) provides us with a set of quite powerful tools we can utilize to, among other things, improve the overall coding experience and the quality of the code we produce.
What we saw in this series is just barely scratching the surface of what can be done and as mentioned some of our code makes certain assumptions and simplifications for example purposes. There is still a lot of challenge in trying to further improve the full extension. Some of the next steps should include improving the correctness of the analysis as well as refactoring the code to better share data and analysis methods.
Nevertheless, this series, I hope, can serve as a beginner type of introduction
to the tools. It certainly was an interesting experience to write. ![]()
![]()
Finally, for a more in-depth set of learning resources for Roslyn I would recommend looking at the following series:
Until next time! ![]()