Recently I’ve been re-exploring some specific aspects of .NET 6 through a small side-project as a way to get back into the latest and greatest of the .NET world.
The side-project is currently a simple API based on the Ardalis Clean Architecture template. The domain is a simple Marketplace where Users, or Merchants, can post/sell/buy/trade products.
The template used comes with a couple of interesting concepts:
- API Single Endpoint Handlers
- Each API Endpoint for a given resource (POST, GET, PUT, DELETE) has it’s own handler that only contains code related to handling that request.
- Onion/Clean Architecture ( Kernel < Core < Infrastructure < API )
- Defines a code organization approach where layer dependencies always go towards the Core/Kernel which aims to be Technology/Framework/Library agnostic.
- Repository Pattern with Specifications
- A generic repository that handles “Specifications”, classes that express queries.
- Mediator, through
[MediatR](https://github.com/jbogard/MediatR)for Business Events
It has some DDD flavor in how things are organized and it was very easy to kick things off by adding Domain entities related to the specific needs of the domain of the Marketplace app.
What id did not have, was any Authentication and Authorization support.
So, this was a perfect chance to explore and re-discover the documentation and features around Authentication in .NET 6.
Also, this could be a chance to both see what a simple solution might look as well as what are the more complicated and robust approaches and best practices.
This article therefore is a collection of notes, structured after the fact, containing explanations and links to official docs and samples I looked at while working on the Authentication Aspects of the Marketplace App.
It’s also a good way to maybe even get some feedback on the approach and learn something new!
So let’s get started!
- ASP.NET Core 6.0 Security and Identity
- Identity Configuration & JWT Tokens
- IdentityServer
- Summary and Additional Resources
ASP.NET Core 6.0 Security and Identity
To start things off there are 2 key links to look at:
- Ardalis Clean Architecture Template
- When I started the Marketplace app it was still based on .NET 5 - but now already migrated to .NET 6
- E-Shop on Web
- Part of a great series of up-to-date samples for .NET Applications
- It contains the simple Authentications Methods reviewed in the article and currently in use in the Marketplace App with slight modifications.
From this point on we will reference
E-Shop on Webas ESW. The following sections will contain code from both ESW and the side-project referenced as The Marketplace App.
After looking at the ESW code the journey to explore and better understand what is going on started by looking at the official docs and guides:
- ASP.NET Core 6.0 Security and
Identity
- Starting Page for all Security and Identity concerns including Authentication.
- Authentication
Overview
- Overview of the Authentication specific features.
The basic concepts here are that Authentication by a service implementing
IAuthenticationService.
This is invoked through middleware we can register in our Startup.cs/Program.cs files.
This service internally uses one of multiple AuthenticationSchemes.
An authentication scheme is a combination of a class/functionality that
implements IAuthenticationHandler, and options (AuthenticationSchemeOptions)
associated with that handler.
Configuring the IAuthenticateService and any Schemes is done in the App Startup Code:
services.AddAuthentication(JwtBearerDefaults.AuthenticationScheme)
    .AddJwtBearer(JwtBearerDefaults.AuthenticationScheme, options => Configuration.Bind("JwtSettings", options));
The above examples configure the general authentication via AddAuthentication
and registers the JwtBearer scheme. It also sets the JwtBearer scheme as
the default by passing the JwtBearerDefaults.AuthenticationScheme parameter to
the method.
It is possible to have multiple schemes configured. If we do configure multiple
schemes we can use Authorization Policies or the Authorization Attributes to
specify what scheme to specifically use to authenticate the user if no Default
is set.
For example we can do:
// We can set the AuthenticationScheme for a single Endpoint.
[Authorize(Roles = "SOME_ROLE_USER_NEEDS_TO_HAVE", AuthenticationSchemes = JwtBearerDefaults.AuthenticationScheme)]
The JWT Scheme defines a Handler, invoked in middleware that plainly, checks that the requests contain an encoded token that contains the information for the user trying to perform the request. What we’ve registered here does not deal with creating any Tokens or verifying usernames or passwords.
Beyond just registering the services needed we also need to setup the middleware required:
app.UseAuthentication();

app.UseAuthorization();
To recap, the high level overview of what we have so far:
Middleware that users Services (IAuthenticationService) and Scheme/Handlers (themselves Injectable Services) to verify that the requests that we are processing, trying to access specific resources, contain information identifying Authenticated and Authorized Users.
This middleware in turn allows us add the [Authorize] attribute thorough our
code whenever we want to secure a given REST Endpoint for example.
So, now the question becomes how do we track Users and Roles? For this we will use some of the additional components of ASP.NET Core Identity.
ASP.NET Core Identity Components
ASP.NET Core Identity Components and Features are best described in the documentation:
- Introduction to Identity
- Is an API that supports user interface (UI) login functionality.
- ASP.NET Core provides ASP.NET Core Identity as a Razor Class Library.
- Manages users, passwords, profile data, roles, claims, tokens, email confirmation, and more.
- Identity is typically configured using a SQL Server database to store user names, passwords, and profile data. Alternatively, another persistent store can be used, for example, Azure Table Storage.
Let’s look at some of these in turn:
ASP.NET Core Identity - UI
First, being a Razor Class Library, it comes with features/components that can be used to implement a Web UI interface very quickly, for performing authentication related user actions like Registration, & Login.
I found that the best explanation of this beyond the Introduction Page was the Scaffold Identity in ASP.NET Core Projects page.
The section covers the pages that can be scaffolded and included in our projects to be customized.
Instead of having them served directly from the ASP.NET Core Identity package.
For the purposes of the Marketplace App, we will not be using any of the UI aspects. The idea of the Marketplace is to have its own UI written in a FE framework, that will be used to hit Auth related API Endpoints.
Managing Data
Managing Identity Data turns out to be the most important and relevant part for the Marketplace application.
We need a way to store and manage User information without implementing all of the data storage and authentication specifics as our own custom solution.
One of the key recommendations, very often repeated, when working on web application projects are to never try and implement your own Authentication Systems and User Data, including User/Role management. Using these features from ASP.NET Core Identity fits nicely with that tip.
The document best describing how the Identity Model works is:
That page “introduces” us to the IdentityDbContext and the generic identity Model types:
- IdentityUser
- IdentityRole
- IdentityUserClaim
- IdentityUserToken
- IdentityUserLogin
- IdentityRoleClaim
- IdentityUserRole
One of the recommendations here is that we can extend the default model types by
inheriting and adding additional properties. That is exactly what we do in the
Marketplace app so that we simplify our User and Role primary Keys to be of type
int:
We create a custom ApplicationUser as well as a custom ApplicationRole and
we use them to create our Custom AppIdentityDbContext:
public class ApplicationUser : IdentityUser<int>
{
}

public class ApplicationRole : IdentityRole<int>
{
    public ApplicationRole() : base()
    {
    }

    public ApplicationRole(string roleName) : base(roleName)
    {
    }
}

// ..

public class AppIdentityDbContext : IdentityDbContext<ApplicationUser, ApplicationRole, int>
{
    public AppIdentityDbContext(DbContextOptions options) : base(options)
    {
    }
}
Identity Custom Storage Providers also shows additional ways we can customize the storage of the user authentication data.
Using this approach we create a Data Model that describes everything we need to manage Users and Roles. One thing to note here is that the model is separate from our Application Model.
Basically, we end up two databases. One dealing with our Users Identity and another dealing with our Users as part of the Marketplace (Merchants).
It’s important to note that there are ways to merge the two concepts and only
have a single database - especially if we further customize the
ApplicationUser to contain Marketplace specific data.
Next, we will see the services that we will use to interact with the data model.
ASP.NET Identity Managers
Having an Identity Data model, we now need the code that will operate over the entities perform all the necessary checks.
Looking at the examples in the Introduction to Identity we can see that there are two key manager services we can use:
- UserManager
- Namespace:
Microsoft.AspNetCore.Identity - Assembly:
Microsoft.Extensions.Identity.Core.dll
- Namespace:
- SignInManager
- Namespace:
Microsoft.AspNetCore.Identity - Assembly:
Microsoft.AspNetCore.Identity.dll
- Namespace:
An additional manager deals with Role Management:
- RoleManager
- Namespace:
Microsoft.AspNetCore.Identity - Assembly:
Microsoft.Extensions.Identity.Core.dll
- Namespace:
Let’s look at some quick examples for the key methods on the UserManager and
SignInManager:
UserManager Methods
We will first look at the method used to create new application users:
UserManager.CreateAsync- Creates a new user in the Identity Store.- Deals with properly storing the hashed password based on Identity configuration
- Can verify that the same user does not already exist.
In our case we need to simply create an instance of the ApplicationUser. We do
this by mapping a request containing our User Information
// 1. Map to Application User
var applicationUser = new ApplicationUser()
{
      Email = request.Email,
      UserName = request.Email
};

// 2. Create New Application User
var createUserResult = await _userManager.CreateAsync(applicationUser, request.Password);
Note how we don not have to deal with anything password related, making sure that the password is hashed before being stored in the database. This is the benefit we are getting by using these Manages
After creating the user, we need to assign roles to the user. We do this by:
// we can check if the CreateAsync result worked out
if (createUserResult.Succeeded)
{
    // add both roles to the user. This can further be controlled by additional logic.
    _ = await _userManager.AddToRolesAsync(applicationUser,
        new[] { AuthorizationConstants.ROLE_SELLER, AuthorizationConstants.ROLE_BUYER });

    return applicationUser;
}
All of the code we’ve seen so far is located in a separate CreateIdentityHandler invoked with Mediatr from a
CreateMerchant API Endpoint
So, what about the merchant data? We already mentioned having two separate
contexts, so we also must insert data in the “domain” database. We can do
that by referencing the Id from the newly created applicationUser.
We the process this in a separate CreateMerchantHandler and the very simple implementation can be:
public async Task<Merchant> Handle(CreateMerchantCommand request, CancellationToken cancellationToken)
{
    var merchant = new Merchant(request.IdentityId, request.FirstName, request.LastName, "");

    var result = await _repository.AddAsync(merchant, cancellationToken);

    return result;
}
SignInManager Methods
We will now look at the PasswordSignInAsync method without going into much detail.
Note that the method is called in an
AuthenticateAPI endpoint that takes aUsernameandPasswordas parameters and returns a Response that will contain a Token used to verify the User. More on this a bit latter!
SignInManager.PasswordSignInAsync- Signs in a user given a Username and Password, as well as some additional configuration parameters.- Among other things deals with properly checking the password against the hashed passwords in the Store.
- The additional options deal with lockouts and remembering user sign-ins.
- Remembering the User Sign in is not a very valid scenario for the Marketplace as we use JWT Authentication as we will see in the next section.
var result = await _signInManager.PasswordSignInAsync(authenticateRequest.Username,
            authenticateRequest.Password, false, false);
RoleManager Methods
Finally, we will look at the RoleManager methods.
The method we will look at is only used to Seed both the Development and Test Data during application/test startup. There are no API Endpoints or Handlers that directly use this method at the moment.
RoleManager.CreateAsync- Creates a new role in the Identity Store.- We use this to seed initial roles for the application.
As an example:
private static async Task SeedRoles(RoleManager<ApplicationRole> roleManager)
{
   await roleManager.CreateAsync(new ApplicationRole(AuthorizationConstants.ROLE_ADMIN));

   await roleManager.CreateAsync(new ApplicationRole(AuthorizationConstants.ROLE_SELLER));

   await roleManager.CreateAsync(new ApplicationRole(AuthorizationConstants.ROLE_BUYER));
}
Identity Managers DI
When requesting the managers in our Endpoints or Handlers, we request them by
also specifying the proper Identity Models. In our case our custom
applicationUser and ApplicationRole.
For example:
public CreateIdentityHandler(UserManager<ApplicationUser> userManager)
{
    _userManager = userManager;
}
Next section looks at how we bring all these concepts together.
Identity Configuration & JWT Tokens
So far, we’ve looked at how using ASP.NET Identity we can have a set of Entities, Data Access objects and Services we can use to manager Users and Roles.
We also looked at the SignInManager and how it is used in the Authenticate
API Endpoint. There we mentioned that after singing in the user we need to
return some sort of Token that can be used for future requests.
This section will look at one option to achieve that through JWT!
What is JWT
JWT stands for JSON Web Token. It is a standard for transmitting all types of secure data between different parties.
One of the primary uses is in Authorization where once a User is logged in each subsequent request to any resources triggered by UI actions can contain the JW Token to identify the User (along with additional User data like Roles).
Additional details on JWT can be found here:
Some notes from that document that briefly summarizes the concepts:
- JW Tokens are strings that encode 3 pieces of information:
- Header - contains Meta Information (ex: type of Token)
- Payload - Can contain Claims.
- Claims are pieces of information used to describe the User
- It could be the identifying User Id, Name and/or any Roles they might have associated for a given resource.
- Signature - A digital signature that is used to verify the integrity of the JW Token.
- We can create Tokens based on the data we have for a User in our Identity Model and return it to the Client.
- In our case this would be creating the token in the
AuthenticateMethod and returning it to the Marketplace Front-End.
- In our case this would be creating the token in the
- The Front-End can then set the JWT on the
Authorizationheader using the Bearer schema.- More about Bearer Schema here: Bearer Schema
Covering that we can now have a look at how this can be configured using ASP.NET Identity.
Configuring Base Identity Services
As mentioned in the intro Authentication Starts with the
IAuthenticationService. We also need to hook up the rest of the Identity
Features which include setting up the Manager services and Database Models.
We start of by registering Identity related services (ex: Managers):
  services.AddIdentity<ApplicationUser, ApplicationRole>()
      .AddEntityFrameworkStores<AppIdentityDbContext>()
      .AddDefaultTokenProviders();
With this one single call we let the Identity system know about our
ApplicationUser, ApplicationRole and the AppIdentityDbContext. This call
also hooks up the managers internally, for example the
UserManager<ApplicationUser>
We also call AddDefaultTokenProviders which is used to support some of the User Management features like Resetting Passwords.
With .NET 6 things have changed in terms of building and bootstrapping web applications. By default, templates don’t contain the Startup.cs file and everything is done in the Program.cs. But we can still refer to the actions of registering Services with DI and setting up the middleware pipeline to process the requests. More information on this can be found here
Next we configure the database/context that we use as our Entity Framework Identity Store:
var connectionStringIdentity =
  configuration
      .GetConnectionString(
          "PsMarketIdentity");

services.AddDbContext<AppIdentityDbContext>(options =>
  options.UseNpgsql(connectionStringIdentity));
We use Postgre SQL as our database which is why we call
UseNpgsql. More information around IdentityDbContext can be found here: https://docs.microsoft.com/en-us/dotnet/api/microsoft.aspnetcore.identity.entityframeworkcore.identitydbcontext?view=aspnetcore-6.0
The final key part in all of this is going to be to configure the actual Authentication Service to use the JWT Handler/Schema.
Configure JWToken Authentication
Let’s have a quick Recap:
- We have setup a way to store information about Users and User Roles
- We have setup a set of services/managers to be able to Create and Sign in Users
- We’ve looked at JWT as an option to pass user information via Claims to each
secure API Endpoint by creating the Token and returning it to the SPA client
for use via the
AuthorizationHeader.
We are missing two critical pieces of setup:
- We need a way to hook up and process the JWT passed with each request to the Authentication and Authorization Middleware.
This means we want the middleware to interact with the following Attribute setup:
[Authorize(Roles = "Seller")]
public class CreateGame : BaseAsyncEndpoint.WithRequest<CreateGameRequest>.WithResponse<CreateGameResponse>
- Last, but certainly not least, we also need to be able to generate JWTs.
For this we will explore both a very simple (integrated) option and near the end of the article more involved alternatives.
Authentication Service and JWT Middleware Setup
Let’s start by assuming that the Client calls do send a JWT.
We setup the services used in our pipeline to handle the tokens by adding this in the Service DI Setup:
var key = Encoding.ASCII.GetBytes(AuthorizationConstants.AUTH_KEY);

services.AddAuthentication(x =>
{
    x.DefaultScheme = JwtBearerDefaults.AuthenticationScheme;
    x.DefaultAuthenticateScheme = JwtBearerDefaults.AuthenticationScheme;
    x.DefaultChallengeScheme = JwtBearerDefaults.AuthenticationScheme;
}).AddJwtBearer(
    config =>
    {
        config.RequireHttpsMetadata = false;
        config.SaveToken = true;

        config.TokenValidationParameters = new TokenValidationParameters
        {
            ValidateIssuerSigningKey = true,
            IssuerSigningKey = new SymmetricSecurityKey(key),
            ValidateIssuer = false,

            ValidateAudience = false
        };
    });
AddAuthentication sets up the IAuthenticationService and the default
Authentication Scheme through the parameter.
We then register and configure the JwtBearer Scheme and underlying Handler, when calling AddJwtBearer.
There is a lot of options related to configuring how the middleware will verify the JWT but we won’t cover a lot of the details here. What we must mention is that the Tokens are encrypted, and we must use a common encryption key for both creating and validating them.
That is why we use the AuthorizationConstants.AUTH_KEY constant for the
IssuerSigningKey. We will see how this comes into play when looking at
creating the Tokens.
After reading the JWT, our middleware will now know to process it and apply the User Information within (username, roles) to the resource being requested.
We now have a BIG Elephant in the Room. How do we generate our JWTs?!

Generating JWTs
Having everything else setup we need to have a look at generating the Token.
We know we have to do this in the Authenticate Endpoint where we use the SignInManager
If we look at the Authenticate constructor, we see that we also request a ITokenClaimsService.
public Authenticate(
   SignInManager<ApplicationUser> signInManager,
   ITokenClaimsService<AppIdentityResult> tokenClaimsService)
{
   _signInManager = signInManager;
   _tokenClaimsService = tokenClaimsService;
}
Let’s also have a full look of the Authenticate Handler:
[HttpPost("api/authenticate")]
[SwaggerOperation(Summary = "Authenticate User",
  Description = "Athenticate User",
  OperationId = "auth.authenticate",
  Tags = new[] { "AuthEndpoints" })]
public override async Task<ActionResult<AuthenticateResponse>> HandleAsync(
  [FromBody, SwaggerRequestBody("The username and password to be used in authentication")]
  AuthenticateRequest authenticateRequest,
  CancellationToken cancellationToken = default)
{
  var response = new AuthenticateResponse();

  // Use Password Sign in to Verify that the provided user credentials from the authenticateRequest are valid.
  var result = await _signInManager.PasswordSignInAsync(authenticateRequest.Username,
      authenticateRequest.Password, false, false);

  response.Result = result.Succeeded;

  if (result.Succeeded)
  {
      response.Username = authenticateRequest.Username;

      // Use the token claims service to generate a token with all the necessary claims.
      // Token generation is based on the unique Username passed in from the request,
      // after it has been verified using the _signInManager
      var tokenResult = await _tokenClaimsService.GetTokenAsync(authenticateRequest.Username);

      // Set the token together with the Roles to the response
      response.Token = tokenResult.Token;
      response.Roles = tokenResult.Result.RoleNames;
  }

  return response;
}
We can ignore Swagger and some of the other code here. We can focus on the Token Generation. As a small note: the way the code is organize is based on the Ardalis Endpoints Approach for which more information can be found here
The key part of the code here is processing the authenticateRequest.Username
and authenticateRequest.Password. We use PasswordSignInAsync to verify the credentials.
If successfully we proceed to use our ITokenClaimsService<AppIdentityResult>
to create the token.
Let’s have a look at it next by looking at the Constructor:
/// <summary>
/// The Token Claims Service is used to generate a valid JWS Security Token.
/// We do this using the JwtSecurityTokenHandler and the User Manager, as well as Merchant Data to generate proper claims.
/// </summary>
public class TokenClaimsService : ITokenClaimsService<AppIdentityResult>
{
    private readonly UserManager<ApplicationUser> _userManager;
    private readonly IRepository<Merchant> _merchantRepository;

    public TokenClaimsService(UserManager<ApplicationUser> userManager, IRepository<Merchant> merchantRepository)
    {
        _userManager = userManager;
        _merchantRepository = merchantRepository;
    }

    // MORE CODE HERE
}
We inject two key data access managers/repositories:
- The
UserManager<ApplicationUser>is used to deal with our Identity Store. It’s something that we did not have to implement - The
IRepository<Merchant>is used to access our application level Database to fetch Merchants associated with a given Identity.
Let us see how we use these data managers to create the token.
Token Creation
Our ITokenClaimsService<AppIdentityResult> defines a single method:
public async Task<ITokenClaimServiceResult<AppIdentityResult>> GetTokenAsync(string userName)
This method is called once a given set of username and password credentials are verified and the user has been “signed in”.
We have a valid Username for the Signed In User for which the next step would be to generate the JWT.
Let’s look at that implementation:
 public async Task<ITokenClaimServiceResult<AppIdentityResult>> GetTokenAsync(string userName)
{
    var jwsSecurityTokenHandler = new JwtSecurityTokenHandler();
    var key = Encoding.ASCII.GetBytes(AuthorizationConstants.AUTH_KEY);

    // retrieve the user - their roles and a merchant (Buyer/Seller) associated for that User
    var user = await _userManager.FindByNameAsync(userName);
    var roles = await _userManager.GetRolesAsync(user);
    var merchant = await _merchantRepository.GetBySpecAsync(new GetMerchantByIdentityIdSpec(user.Id));

    // We must have a merchant associated for every identity we store
    if (merchant == null)
    {
        throw new MerchantMissingForValidIdentityException();
    }

    // Start creating the list of claims for the given user
    // add the username
    var claims = new List<Claim> { new(ClaimTypes.Name, userName) };

    // Add Role Claims
    foreach (var role in roles) claims.Add(new Claim(ClaimTypes.Role, role));

    // Add the Merchant Id Claim
    // We need the Merchant Id Claim to perform certain actions
    // For example, we have to know the MerchantId to store Products for the given merchant.
    claims.Add(new Claim(AuthorizationConstants.MERCHANT_CLAIM_KEY, merchant.Id.ToString()));

    // Configure the Token "Description"
    var tokenDescriptor = new SecurityTokenDescriptor
    {
        Subject = new ClaimsIdentity(claims),
        Expires = DateTime.UtcNow.AddDays(7),
        SigningCredentials = new SigningCredentials(new SymmetricSecurityKey(key),
            SecurityAlgorithms.HmacSha256Signature)
    };

    // Create and Write a Token String
    var token = jwsSecurityTokenHandler.CreateToken(tokenDescriptor);
    var tokenString = jwsSecurityTokenHandler.WriteToken(token);

    // Return the Results - The Token String and
    // include the Roles Associated with the Given Identity
    return new AppTokenClaimServiceResult
    {
        Result = new AppIdentityResult
        {
            RoleNames = roles.ToList()
        },
        Token = tokenString
    };
}
The primary service we use to create the JWT is the JwtSecurityTokenHandler
defined in the System.IdentityModel.Tokens.Jwt namespace.
Of important note here is that we also reference the the same key:
AuthorizationConstants.AUTH_KEY for, as we will see, sign the Token. This
creates that relationship between the Token created here and the Setup of the
Services and Middleware used to read the Token.
The next couple of lines fetch all the data needed to create the token with all the needed Claims.
This includes:
IdentityUser(throughFindByNameAsync), theIdentityRoles(throughGetRolesAsync)Merchant(throughGetBySpecAsync(newGetMerchantByIdentityIdSpec(user.Id))
We then create our list of Claims List<Claim>.
The final part of the code deals with Creating and Signing the Token where we
use the jwsSecurityTokenHandler to Create and Write the Token as a string.
We then return the Result, basically returning the Token to the Authenticate
Endpoint invoking the function.
The endpoint then returns this Token back the UI making the call with the
credentials.
And that is it! Now the UI/Client can store the JWT returned and use it to set
the Authorization Header.
Note that we’ve created these tokens with an expiry time. At this point we won’t go into details around Refresh Tokens or how to handle/process expiries on the UI side.
The next section covers an alternative, more advanced approach to Auth, as well as some underlying concepts and protocols that can be used to secure APIs.
IdentityServer
At this point, we’ve seen how ASP.NET Identity helps us define and Store User identity information, Sign In users, generate JWTs and Verify the JWTs for each request through middleware.
We’ve created a data store for User Information with Certain Roles and a way to
generate Tokens through the Authenticate Method based on the Credentials against that store.
The Token generated is then used to authenticate with our other Endpoints by setting up a middleware to work with JWTs.
This is where things get interseting!
In a way, technically we can use this same approach and have our Authenticate
method generate Tokens that authorize the client to also access different API’s.
We can basically implement a Single Sign-On (SSO) system. Using a single
Authenticate request to generate a token for multiple Services and API’s
This is where the concept of an Authorization or Identity Servers comes in! And ASP.NET Identity does come with full support for such an implementation.
ASP.NET Identity has a set of integration points helpers to simplify working with Duende Identity Server, formerly IdentityServer4
IdentityServer4 re-branded/changed/evolved into Duende Identity Server, changing the licensing model, which is covered both in the .NET Docs and the Starting page in the IdentityServer4 Docs Pages.
For a really good introduction to how all of this works refers to the following:
With all of this we can certainly consider an alternative to how we could have implemented our very simple Authentication approach. The ASP.NET Docs do cover such an approach for single page applications:
- [Authentication and authorization for SPAs][https://docs.microsoft.com/en-us/aspnet/core/security/authentication/identity-api-authorization?view=aspnetcore-6.0]
Some of the key differences here are the way we register Identity:
services.AddDbContext<ApplicationDbContext>(options =>
    options.UseSqlite(Configuration.GetConnectionString("DefaultConnection")));

services.AddDefaultIdentity<ApplicationUser>()
    .AddEntityFrameworkStores<ApplicationDbContext>();
Notice the call to AddDefaultIdentity which also adds the Default UI that is
going to be served by the IdentityServer.
We also register the IdentityServer related services together with the IdentityServer JWT Handler:
services.AddIdentityServer()
    .AddApiAuthorization<ApplicationUser, ApplicationDbContext>();

// ...

services.AddAuthentication()
    .AddIdentityServerJwt();
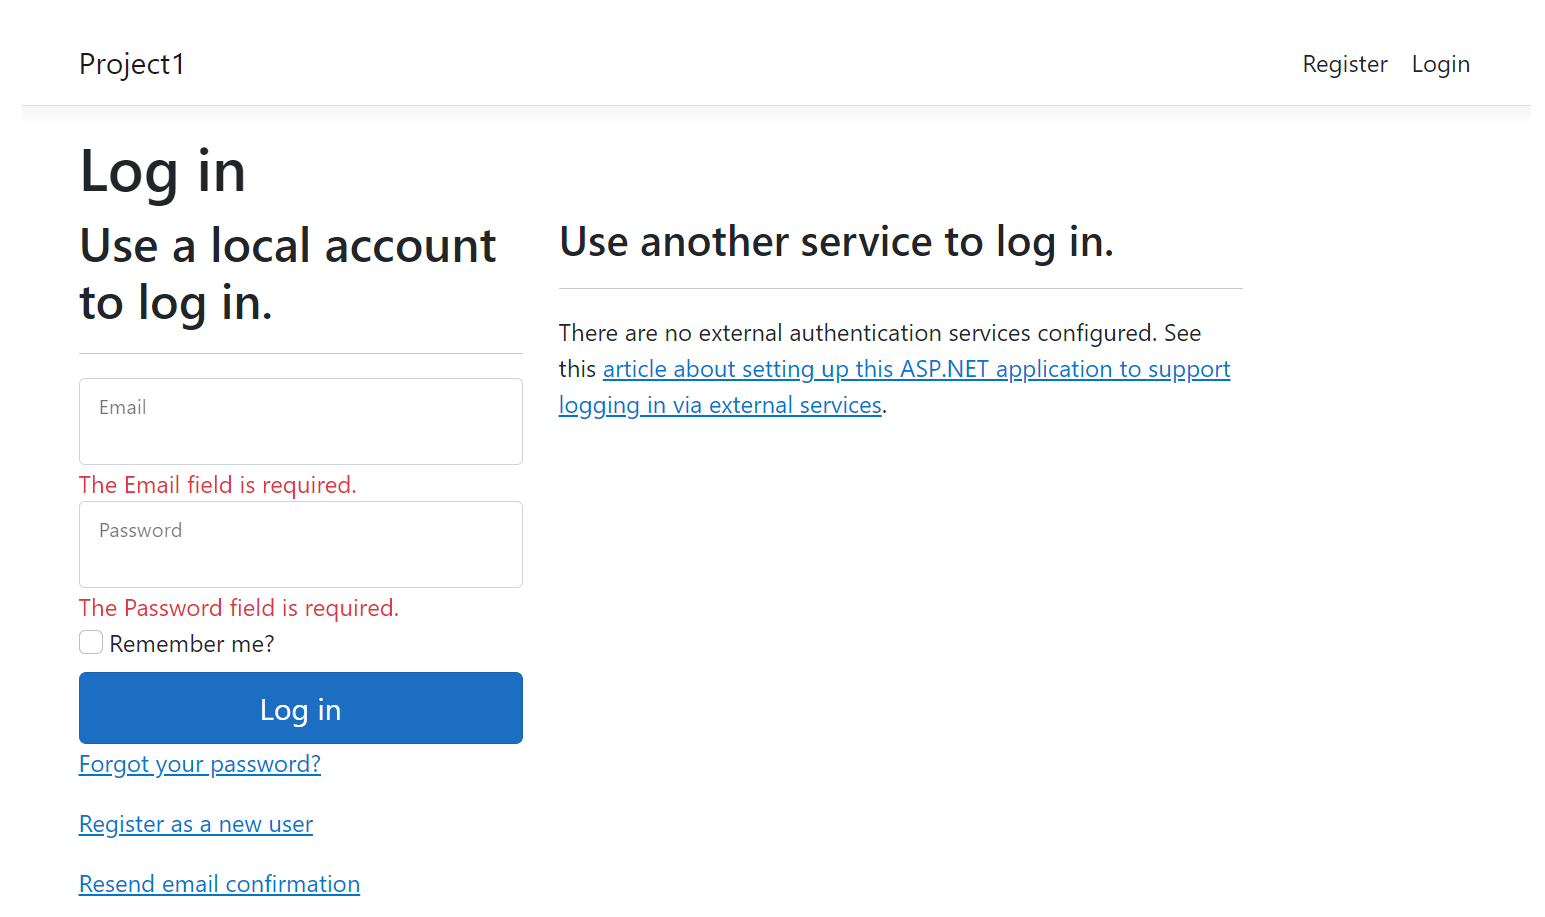
All of this convention and out of the box implementation results with us hosting an Identity Server that can serve default Login Pages. We can quickly see this in action running out of the box with the ASP.NET 6 SPA Project Template:
We can also look at the docs on the Duende Identity Server side, specifically Protecting an API using Client Credentials to see a very similar approach.
Underlying Protocols and Standards
To complete the Identity Server section, the The Big Picture link above also can serve as a good introduction to some key protocols and concepts related to Identity:
- OAuth 2.0)
- Industry Standard Protocol for Authorization.
- OpenID Connect
- Identity Layer built on top of OAuth 2.0 - describes how Users can Authenticate via Authorization Servers through a REST-like approach.
These serve as the foundation for a lot of the Auth/Authorization and Identity Server related features in ASP.NET Identity, describing everything from discoverability to implementing SSO with multiple Clients and API Scopes as well as Refresh Tokens.
For now, we won’t go into any detail around these as the current simple approach we have setup up until now is enough for a simple Marketplace App.
Summary and Additional Resources
What we’ve covered in this post is a simple implementation of Authentication as well as role Authorization. This was done by utilizing the base features of ASP.NET Identity.
But we also saw that there are more advanced and interesting ways to re-implement what we have though Authorization Servers.
The basic setup and all the information also can serve as a good way to explore and setup the more advanced approaches.
What we’ve not covered here and could be covered in a next post is testing. We
can see how we can use the WebApplicationFactory to write simple Integration
tests
that test methods with the [Authorize] attribute.
As a final note we can also look at some of the other resources that can be useful to everything discussed so far:
- For some more guidance on JWT we can reference the following post: JWT Validation and Authorization in ASP.NET Core
- An additional Auth Server with a guide for Angular: Auth0 Angular Quick Start